Stashing your work
To push a new stash onto your stack, run:
$ git stash
Saved working directory and index state "WIP on master: 049d078 added the index file"
HEAD is now at 049d078 added the index file
(To restore them type "git stash apply")
Your working directory will cleaned and all tracked files by git are stored on your stack.
At this point you're free to make changes, create new commits, switch branches, and perform any other Git operations; then come back and re-apply your stash when you're ready.
Note that the stash is local to your Git repository; stashes are not transferred to the server when you push.
Stash with a message
To make our stash changes more descriptive we could add optional stash message:
$ git stash save "Descriptive Message of changes"The save option is automatically assumed if it isn't included.
Stashing untracked or ignored files
By default, running git stash will stash:
- changes that have been added to your index (staged changes)
- changes made to files that are currently tracked by Git (unstaged changes)
But it will not stash:
- new files in your working copy that have not yet been staged
- files that have been ignored
So if we have any files in the project, that isn't stages (i.e. we didn't run git add), git stash won't stash it. Adding the -u option (or --include-untracked) tells git stash to also stash your untracked files:
$ git stash -u
$ git stash save --include-untracked
We can include changes to ignored files as well by passing the -a option (or --all) when running git stash:
$ git stash all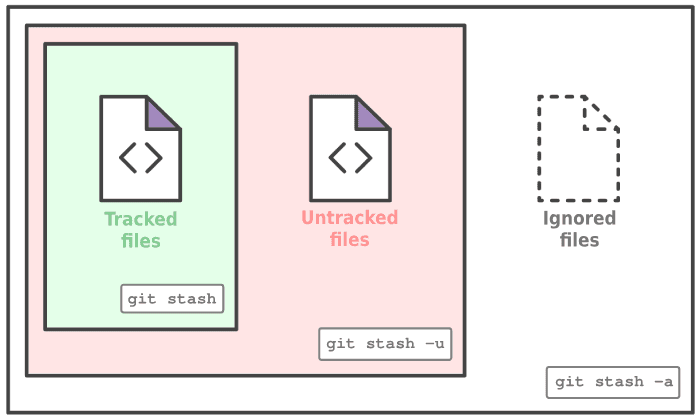
Partial stashes
You can also choose to stash just a single file, a collection of files, or individual changes from within files. If you pass the -p option (or --patch) to the stash command, it will iterate through each changed "hunk" in your working copy and ask whether you wish to stash it:
$ git stash -p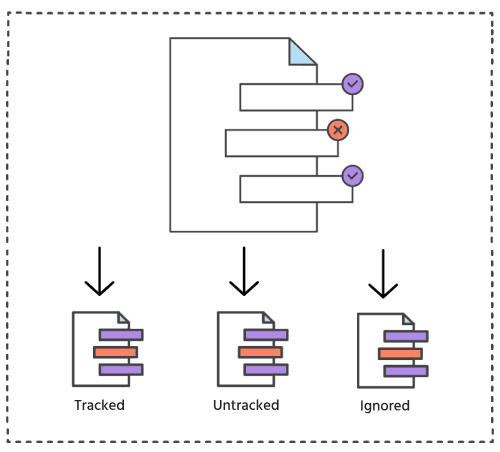
There is no explicit "abort" command, but hitting CTRL-C(SIGINT) will abort the stash process.
Viewing stash diffs
You can view a summary of a stash with git stash show:
$ git stash show
index.html | 1 +
style.css | 3 +++
2 files changed, 4 insertions(+)
Or pass the -p option (or --patch) to view the full diff of a stash:
$ git stash show -pListing stashed changes
You aren't limited to a single stash. You can run git stash several times to create multiple stashes, and then use git stash list to view them. By default, stashes are identified simply as a "WIP" – work in progress – on top of the branch and commit that you created the stash from. After a while it can be difficult to remember what each stash contains, if you didn't save your changes with descriptive message:
$ git stash list
stash@{0}: On master: add style to our site
stash@{1}: WIP on master: 5002d47 our new homepage
stash@{2}: WIP on master: 5002d47 our new homepage
Re-applying your stashed changes
To apply a stash to the working directory, we have a couple of options. The first is:
$ git stash popwhich will remove the most recent stash from the list and apply it to the current working directory. It's just reversing what you did when saving the stash (but keeping any subsequent repository changes intact).
You can also be specific and pop any stash in the list:
$ git stash pop stash@{1}We should see something like this at the end of the output:
Dropped stash@{0} (38f88c1479dc8a3c63f794feed7cd276ae3c6c7e)The other option when applying a stash is to use:
$ git stash applyJust like with pop, we can choose to not specify a stash and it will use the latest. Or, we can specify one, like this:
$ git stash apply stash@{1}With apply, we'll get similar output when applying the stash, but without the message that the stash was dropped. Why? Because git stash apply applies the stash we specified but it doesn’t drop it from the list of stashes.
Creating a branch from a stash
If the changes on your branch diverge from the changes in your stash, you may run into conflicts when popping or applying your stash. Instead, you can create a new branch to apply your stashed changes to:
$ git stash branch new-branch-name stash@{1}
Switched to a new branch 'new-branch-name'
On branch new-branch-name
Changes to be committed:
new file: style.css
Changes not staged for commit:
modified: index.html
Dropped refs/stash@{1} (32b3aa1d185dfe6d57b3c3cc3b32cbf3e380cc6a)
This checks out a new branch based on the commit that you created your stash from, and then pops your stashed changes onto it.
Cleaning up your stash
If you decide you no longer need a particular stash, you can delete it with drop command. This command deletes the latest stash from the stack. But use it with caution, it maybe be difficult to revert.
You can also specify the stash id:
$ git stash drop stash@{1}
Dropped stash@{1} (17e2697fd8251df6163117cb3d58c1f62a5e7cdb)
Or you can delete all of your stashes with:
$ git stash clearBe careful, as clear command deletes all the stashes made in the repository. It maybe impossible to revert.