Despite the fact that Amazon S3 is an excellent storage for static data for our application, many find it quite difficult to configure and customize it. So let's walk step by step through the actions that need to be taken to properly and safely work with the data storage.
AWS setup
Let's create and configure everything we need to work with Amazon S3.
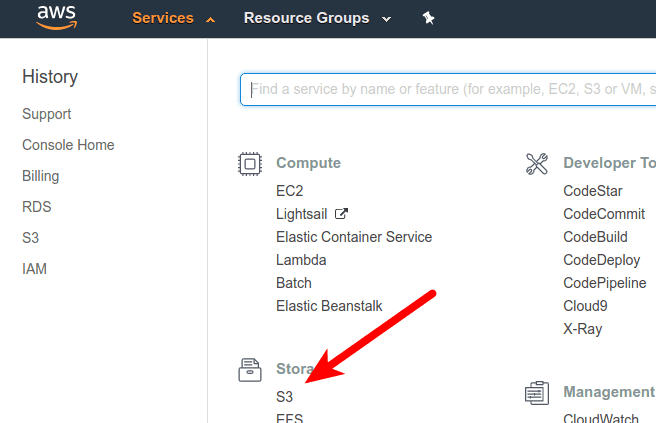
Step 1: Create S3 bucket
You can skip this step, if you already has a bucket you need.
This is the easiest part. Log into AWS Management Console and navigate to S3.
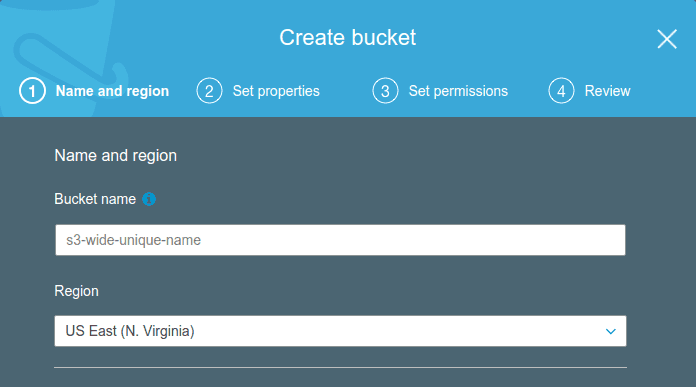
Press "Create bucket" button. Set bucket name, that must be unique across all existing bucket names in Amazon S3, and region where it should be located. You can choose any region, but then you’ll need to use the corresponding region ID in the config file. Amazon keeps a list of region names here. Then set properties and permissions.
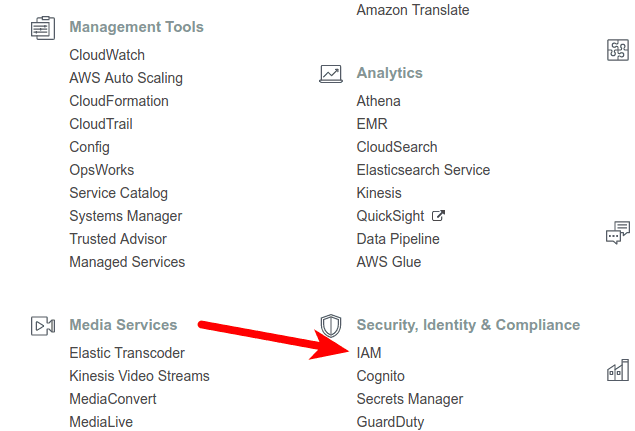
Step 2: Create IAM Policy
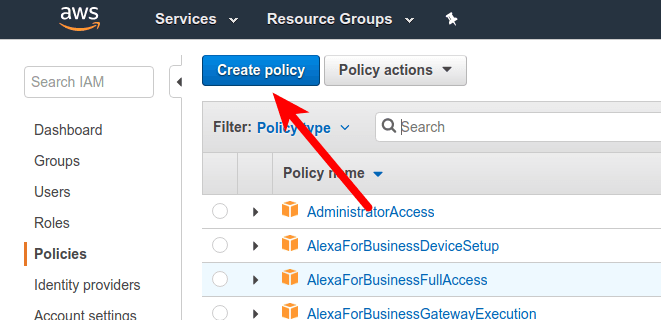
Navigate to IAM and create new policy from Policy tab.
Select JSON tab to insert the following configuration:
{
    "Version": "2012-10-17",
    "Statement": [
        {
            "Sid": "VisualEditor0",
            "Effect": "Allow",
            "Action": [
                "s3:ListBucket",
                "s3:GetBucketLocation"
            ],
            "Resource": "arn:aws:s3:::bucket-name"
        },
        {
            "Sid": "VisualEditor1",
            "Effect": "Allow",
            "Action": [
                "s3:PutObject",
                "s3:GetObject",
                "s3:DeleteObject"
            ],
            "Resource": "arn:aws:s3:::bucket-name/*"
        },
        {
            "Sid": "VisualEditor2",
            "Effect": "Allow",
            "Action": "s3:ListAllMyBuckets",
            "Resource": "*"
        }
    ]
}
Note that you must change the name of your S3 bucket in the Resource key.
Then you can return back to Visual editor tab to check if there is no errors or warnings. If everything is fine, press Review policy button.
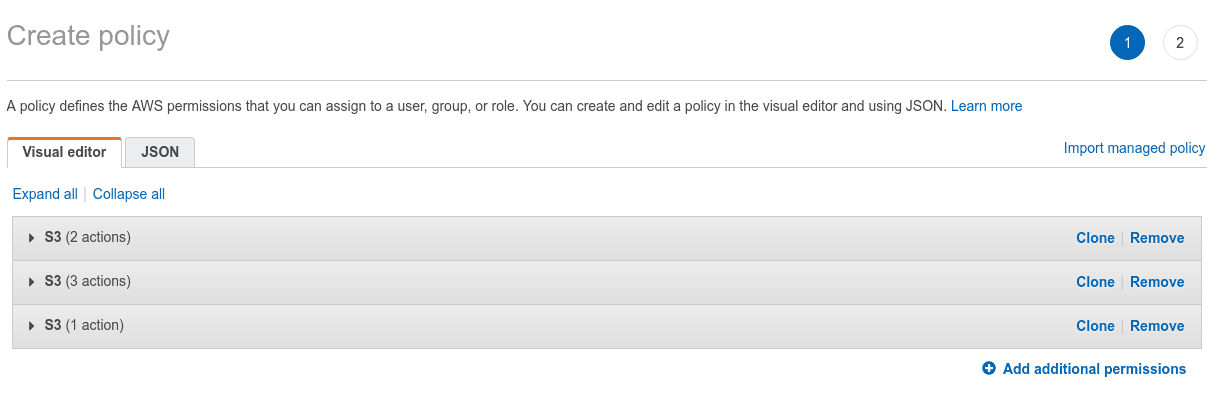
Insert unique policy name and optionally some descriptive description, that can be helpful, if you have a lot of custom policies.

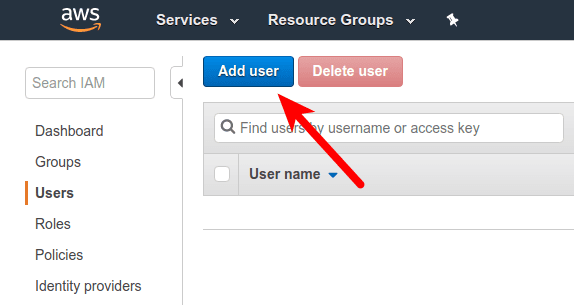
Step 3: Create IAM user
In IAM select tab User and press button Add user.
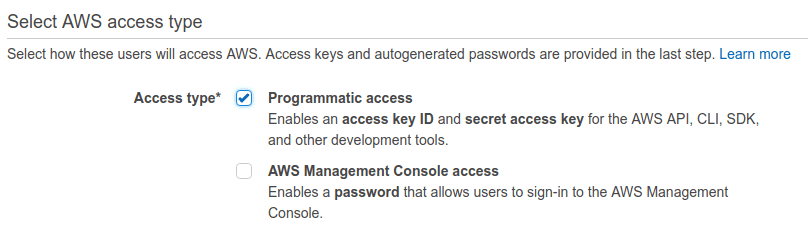
Make sure the Programmatic Access is ticked, so the system generates a Key and Secret.
Then we need to assign permissions to our user. AWS offers a few template policies we’ll completely ignore, since they grant far too much access. We need our user to only be able to access the specific bucket we created. For that, we’ll opt to attach existing policies directly and search for policy we created before. In case you missed that step, you can create during this process by clicking Create policy. This will open new tab in browser to create new policy.
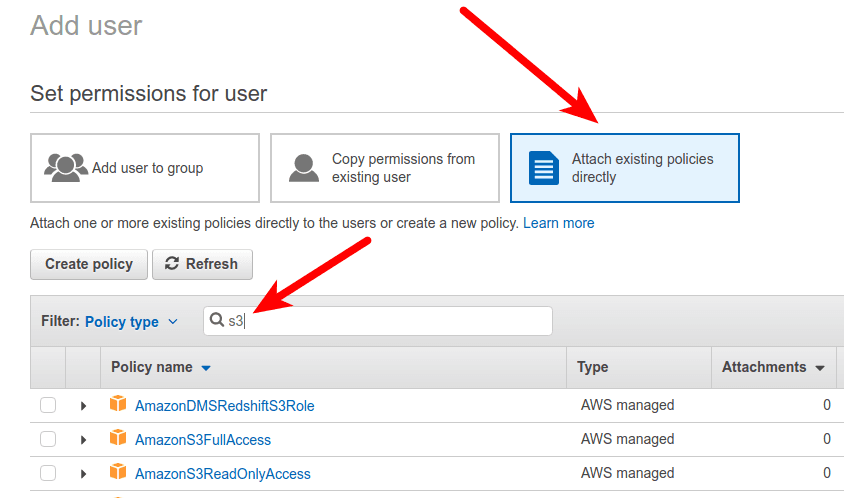
Select policy from list by ticking the checkbox and proceed next, clicking Next: Review, and then Create user. It’ll give you the Access key ID and Secret access key like so:
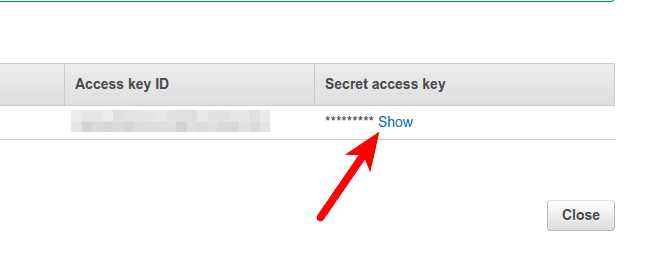
The Access Key ID (key) and Secret access key (secret) will be plugged into the config file.
Configure Laravel
We need to edit our AWS_* environment variables from .env, that will be used by configuration file config/filesystems.php.

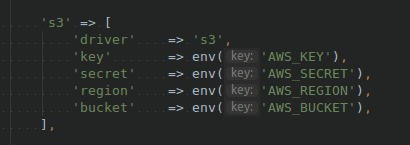
Note: Make sure that composer.json dependencies require "league/flysystem-aws-s3-v3": "~1.0" package.
And done! The filesystem is now configured. Let's test it with Tinker console tool.
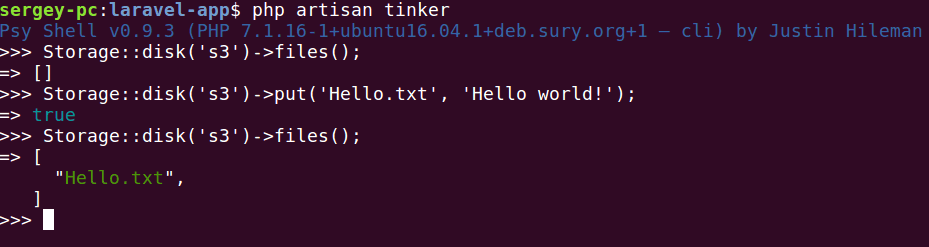
Perfect! Now your S3 storage properly configured and you can use it!
TL;DR: Conclusion
On the AWS side, you need a few things:
- An S3 bucket
- An IAM user
- An IAM policy attached to that user to let it use the bucket
- The AWS Key and Secret belonging to the IAM user
ResourcesClick to expand/shrink