GitHub Pages (aka gh-pages) is a great feature introduced by GitHub to host your personal, organization, or project pages directly from a GitHub repository. Follow step by step guide below to enable your website on GitHub Pages.
Step 1: Enable GitHub Pages
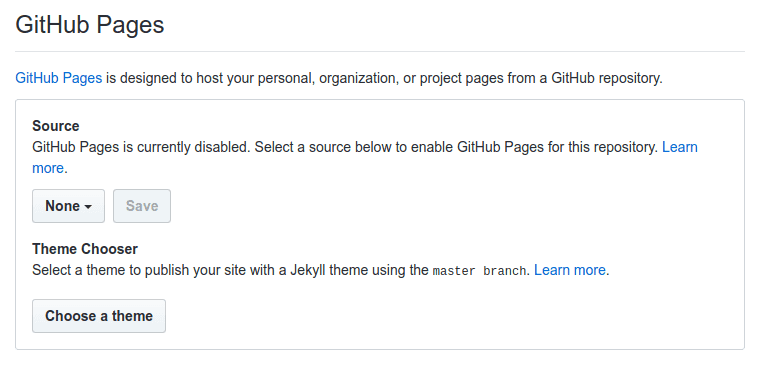
First you need to do is enable GitHub to host code from your repository. Under your repository name, click Settings and navigate to GitHub Pages block.

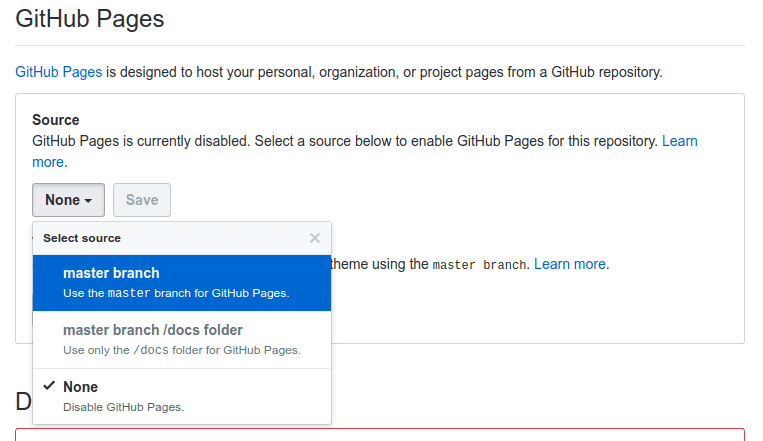
From drop-down menu select source branch which should be hosted.

A Project pages site is available at http://<username>.github.io/<projectname> for a personal account and at http://<orgname>.github.io/<projectname> for an organization account.
Step 2: Set up custom domain
To set up a custom domain for your GitHub Pages site, you'll need to choose your custom domain and registering it with a DNS provider (like Uniregistry, Hostinger, GoDaddy or any other), configure your domain with your DNS provider, and add your custom domain to your GitHub Pages site on GitHub.
Step 2.1: Add CNAME file
To let GitHub know which website should be servered, just add your full website name without protocol to CNAME file, which should be located in core of your project.

Step 2.2: Add custom domain to GitHub Pages
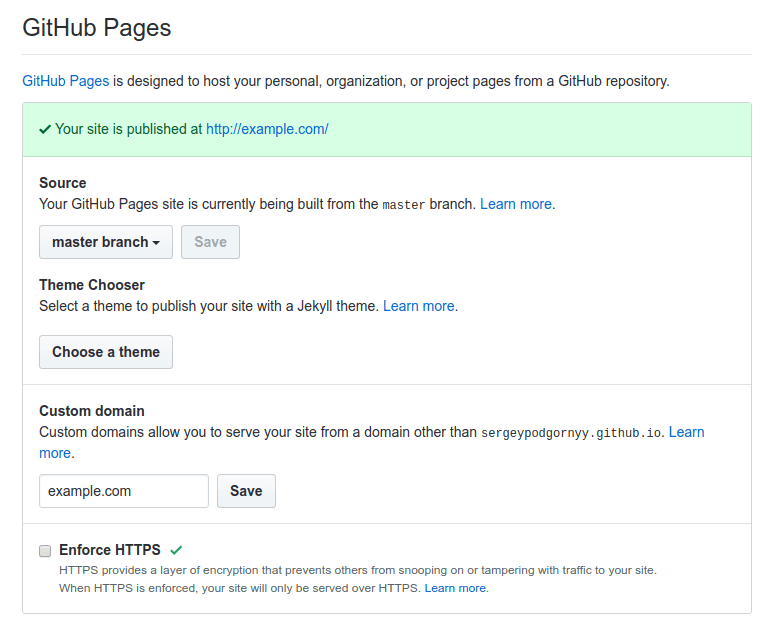
Go back to repository settings and provide your website full name as in CNAME file.

Step 2.3: Add A records to your DNS provider
Follow your DNS provider's instructions to create A records that point your custom domain to the following GitHub IP addresses:
185.199.108.153
185.199.109.153
185.199.110.153
185.199.111.153
Step 3: Enable HTTPS
Enforcing usage of HTTPS it has never been so easy, you just need to select Enforce HTTPS and that's all.

Note, that GitHub Pages sites shouldn't be used for sensitive transactions like sending passwords or credit card numbers.
TL;DR: Conclusion
GitHub probably the best option for you, if you need to publish your static website online. It's free and easy configurable. All you need to have is just a domain name and pushed CNAME file in your repository.


